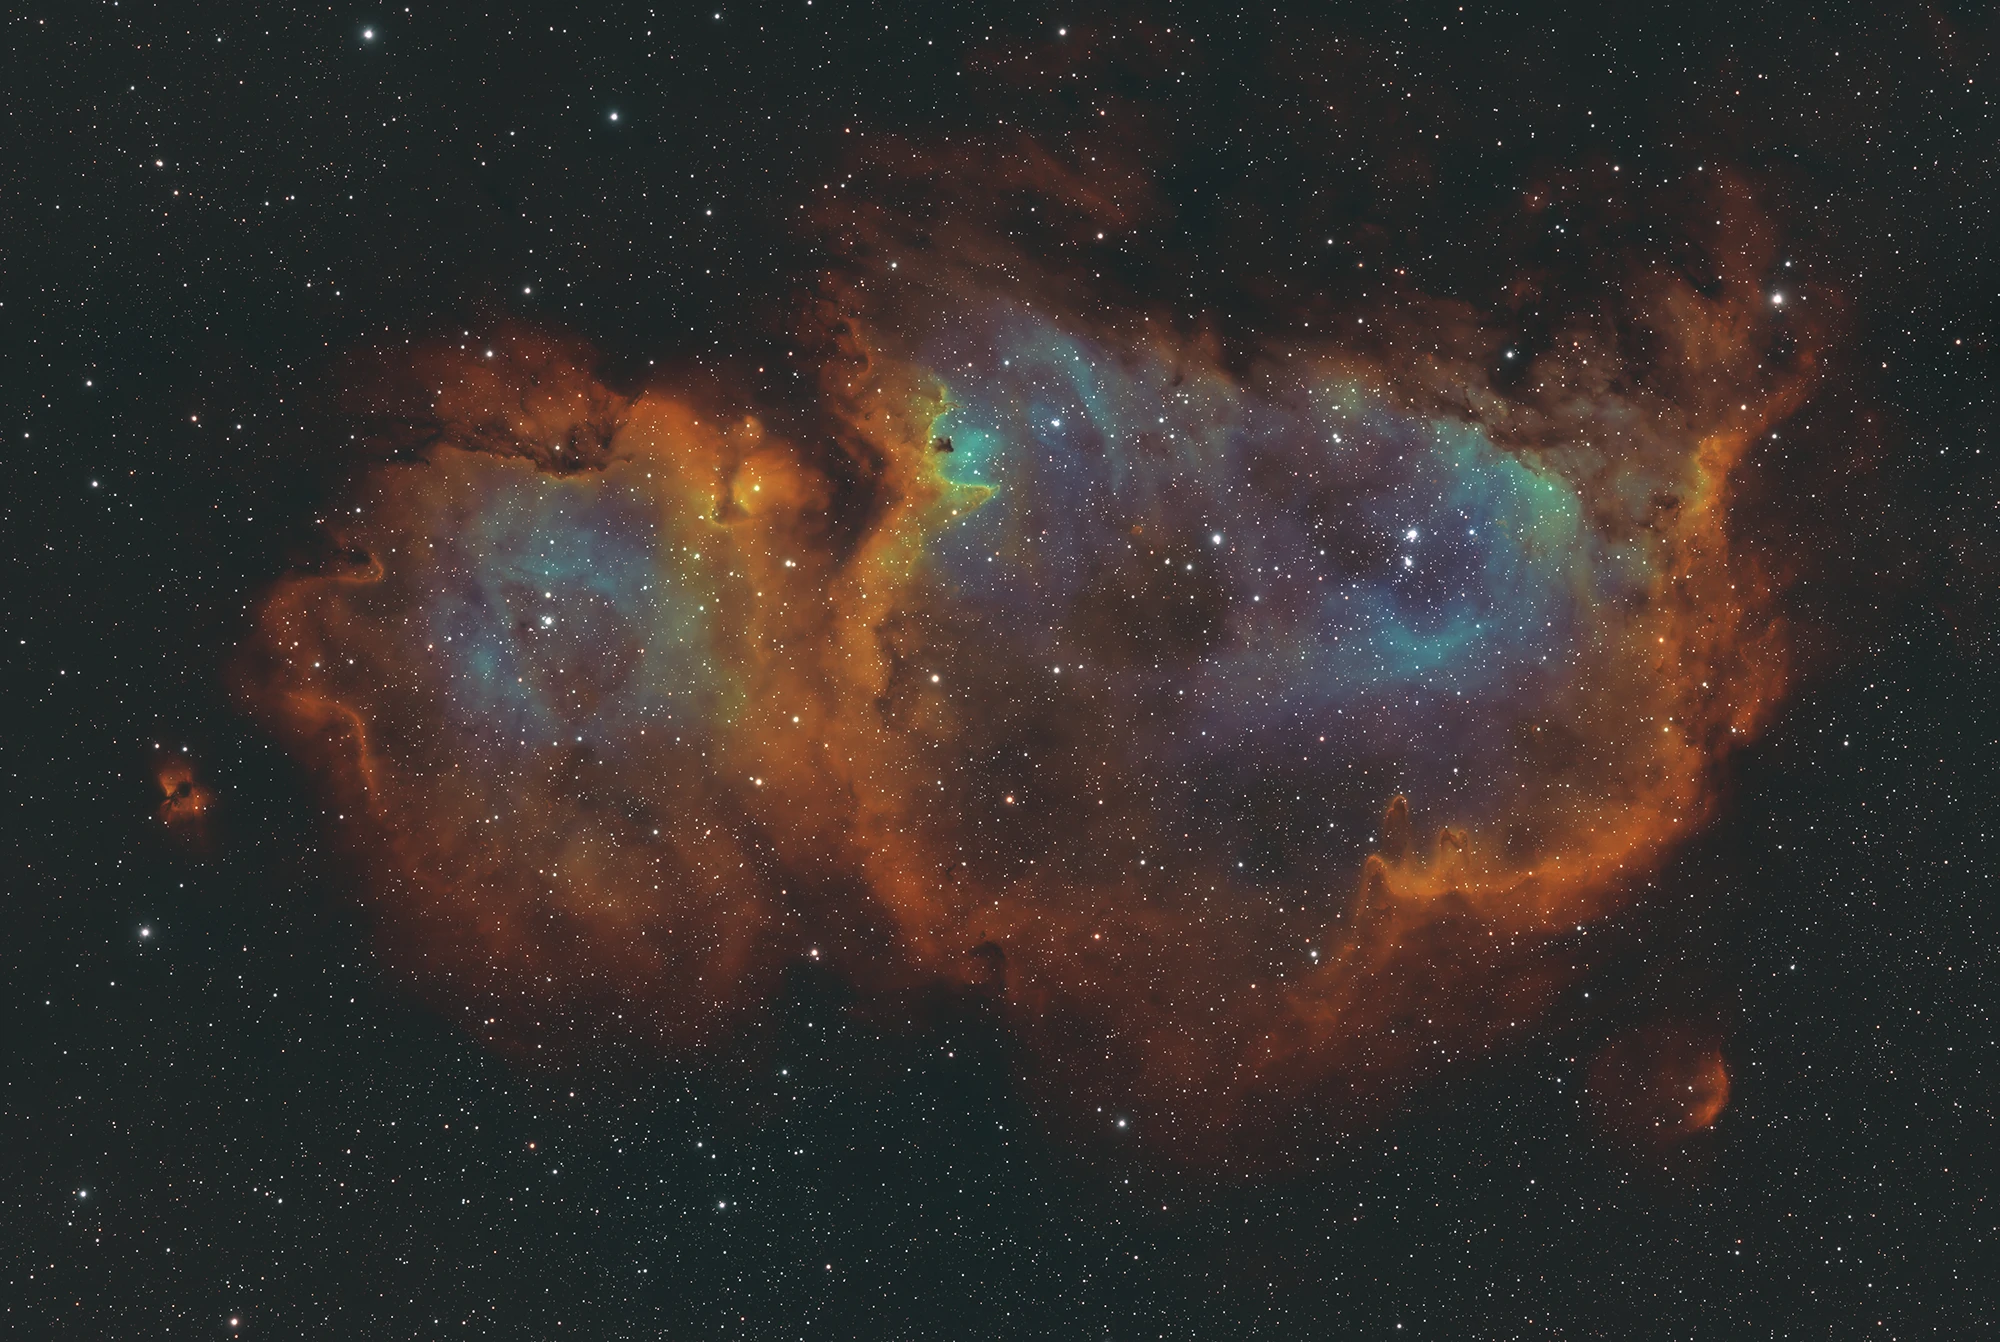
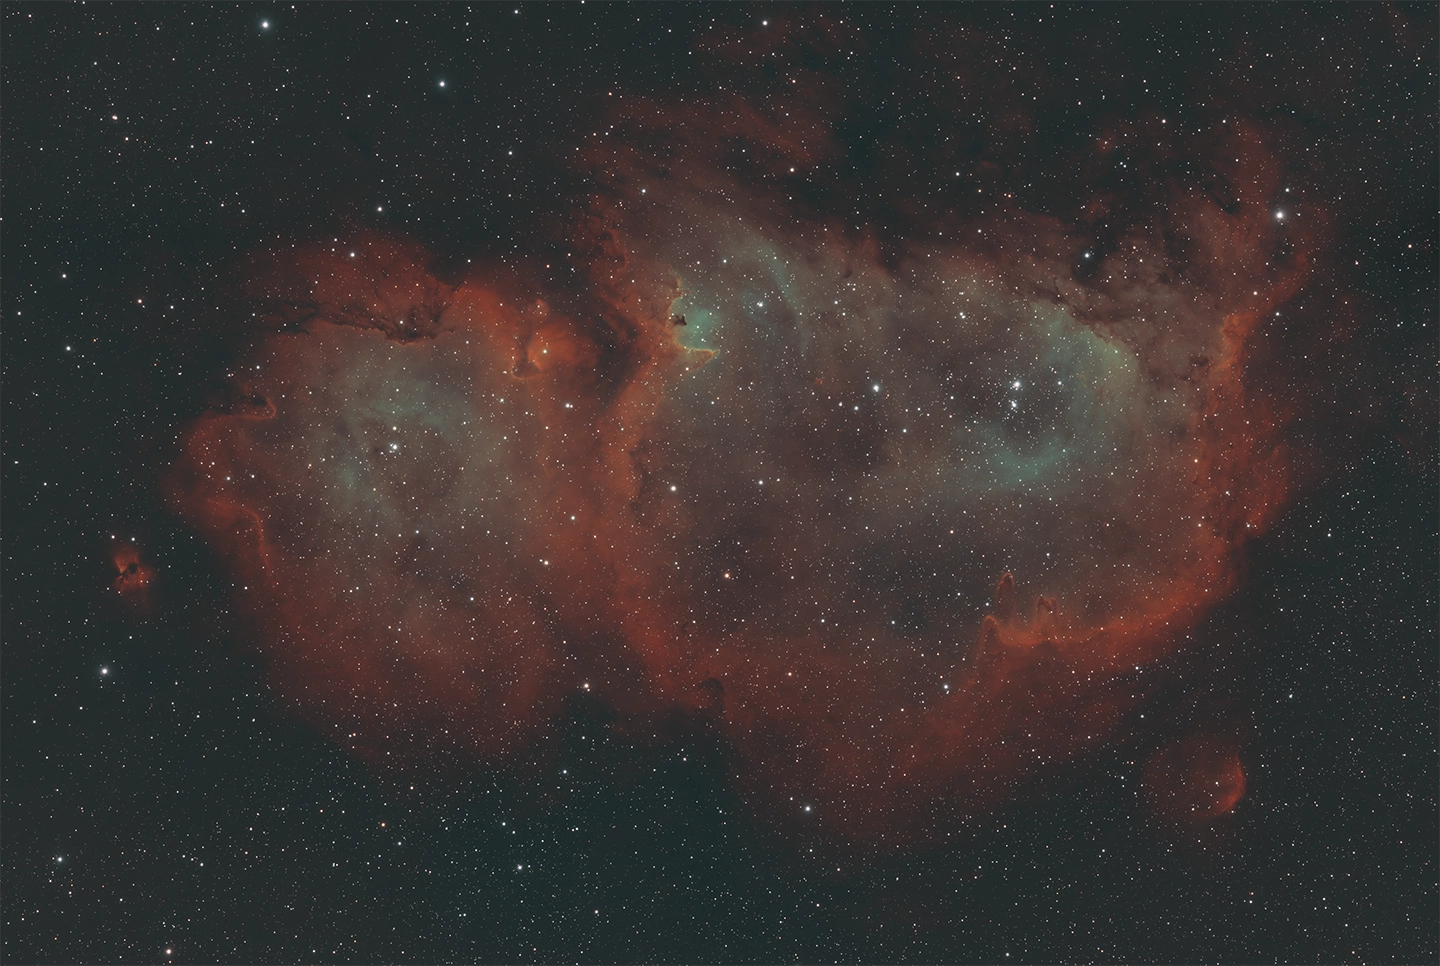
The Soul Nebula is an emission nebula found in the constellation Cassiopeia, about 7500 light-years away from our planet. It's worth noting that the color you see in the image does not accurately represent the nebula's appearance if viewed directly through a telescope or captured with an RGB camera. However, that doesn't mean that this image is not authentic. The image is a result of merging hundreds of individual monochrome images taken over six nights, which amounts to roughly 20 hours of image data. Check out the step-by-step guide below to learn more about capturing and combining those individual image frames into this final image.
The Soul Nebula
One From Many
A common issue with deep sky astrophotography is getting enough signal of your imaging target. The solution is to expose for a long time, take many images, and then stack those images onto one another to increase the overall signal.
Since I have a monochrome camera, I need three sets of images to create an RGB image. A trio of narrowband filters (meaning they let in only a tiny fraction of the visible light spectrum) were used. Only a narrow band of the visible light spectrum can pass through these filters. Specifically, we are getting light produced by ionized hydrogen, sulfur, and oxygen - a similar concept to how neon lights work.
In total:
Hydrogen Alpha (Ha) filter: 134 images @ 5 minutes each
Sulphur II (SII) filter: 94 images @ 5 minutes each
Oxygen III (OIII) filter: 104 images @ 5 minutes each.
Typically, you would want more exposure time with the SII and OIII filters than with the H-alpha filter. Unfortunately, this target has a few more hours of H-alpha data, as I had to throw out roughly 30 images for each of the SII and OIII filters due to focus issues or clouds.
Let's look at an individual sub-exposure from each of these images.
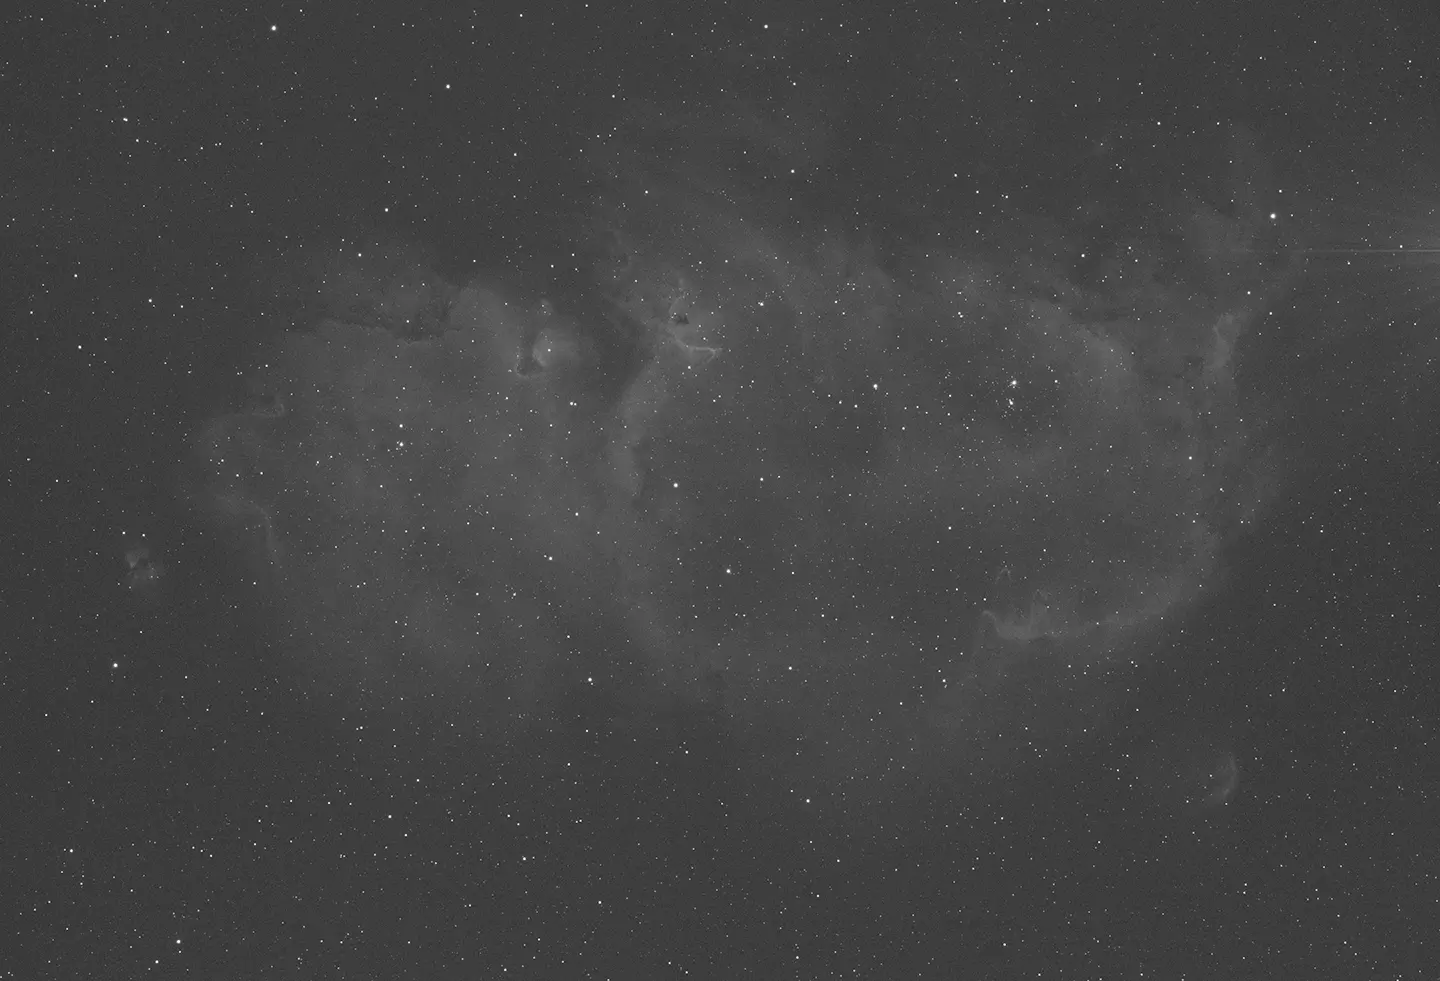
H-alpha Sub-Exposure
This is a 5-minute exposure through a Hydrogen Alpha (H-alpha) 6nm filter. The light within the H-alpha band (~656-nanometer wavelengths) is allowed while all other visible light is blocked. Hydrogen is the most common element found in the universe, and when there is a star nearby, some hydrogen gas that gas becomes ionized. This ionization emits the H-alpha photons that pass through this filter and hit the camera's sensor.
The cloud-like structures in this image are massive "clouds" of ionized Hydrogen gas.
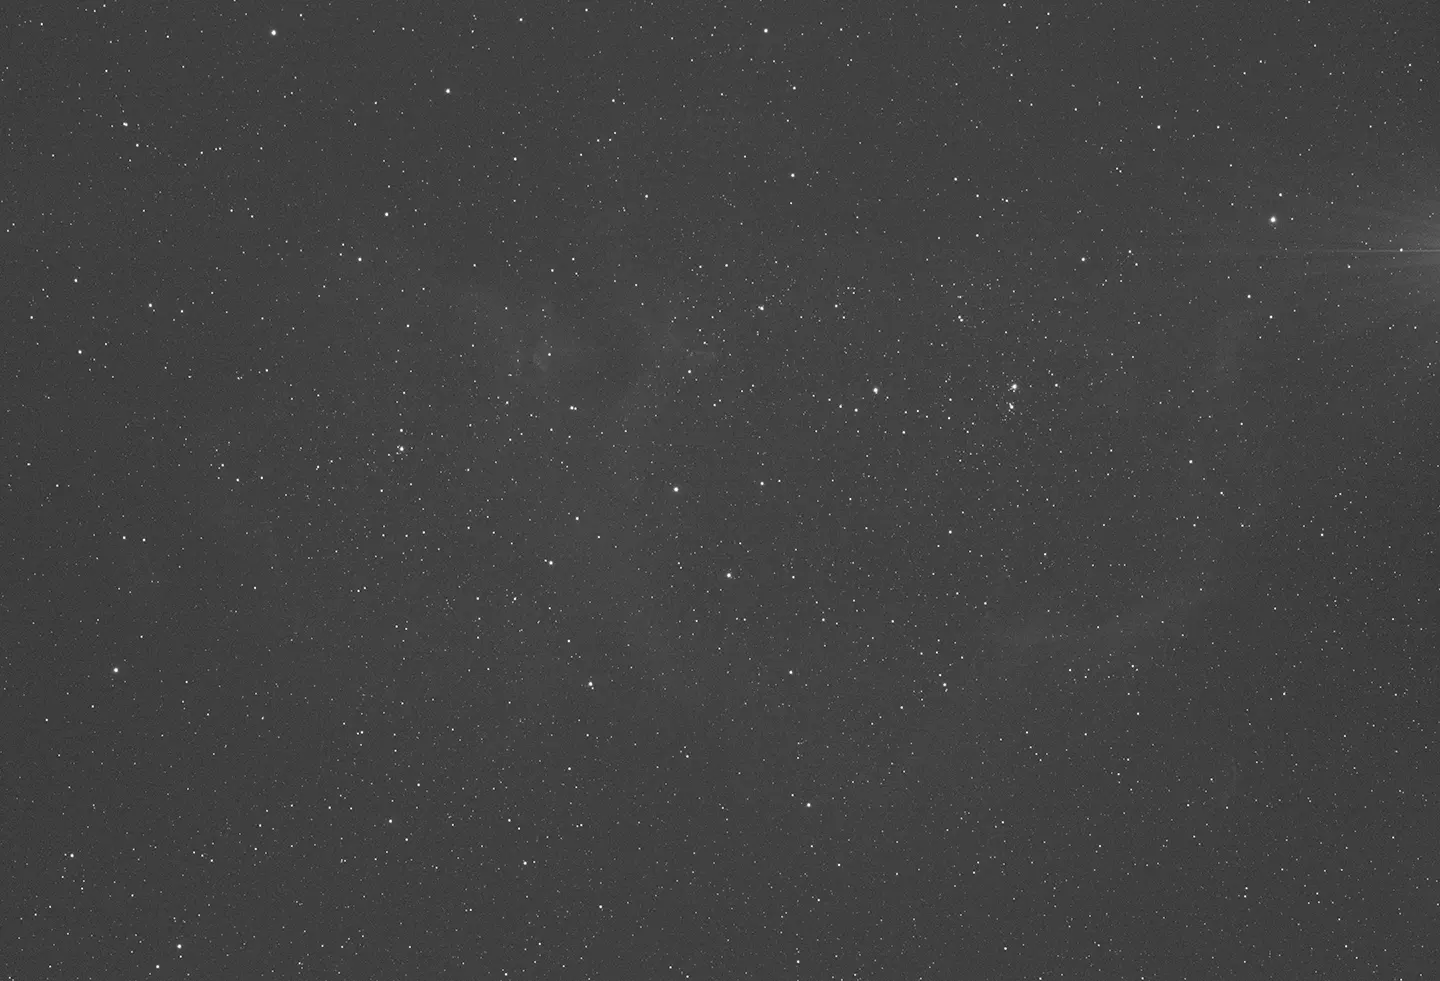
SII Sub-Exposure
This is a 5-minute exposure through a Sulfur II (SII) 6nm filter. The light within the SII band (~672-nanometer wavelength) is allowed while all other visible light is blocked. Specifically, this lets through the light produced by "singly ionized" sulfur atoms. This is when a sulfur atom has one fewer electron than a proton.
The cloud-like structures in this image are quite faint compared to those in the H-alpha filter, but when we stack all of the SII images together, they will be more apparent.
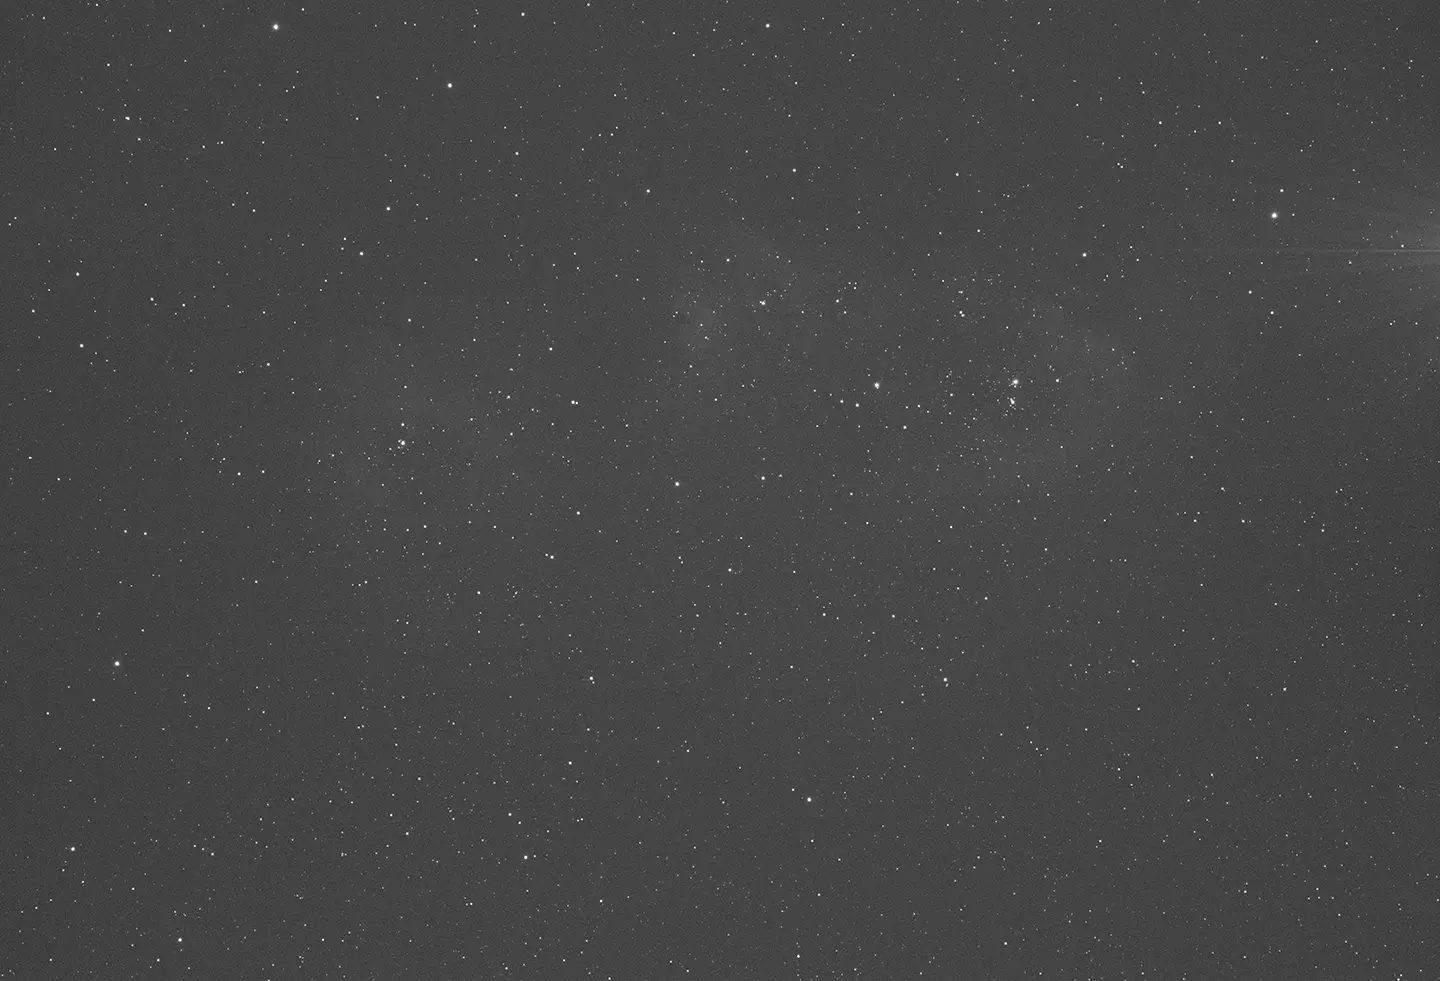
OIII Sub-Exposure
This is a 5-minute exposure through an Oxygen III (OIII) 6nm filter. The light within the OIII band (~501-nanometer wavelengths) is allowed while all other visible light is blocked. Specifically, this lets through the light produced by the "doubly ionized" oxygen atoms. An OIII filter is beneficial for capturing planetary nebulae; the Soul Nebula is an emission nebula but still contains a large amount of doubly ionized oxygen gas.
Similar to the SII image, the cloud-like structures here are faint. It's easier to see them by quickly swapping between the SII and OIII images.
Calibration
So far, the above exposures don't have much signal and are still monochrome. We'll be addressing these shortly. One thing, though, that you may have noticed is that if you click between the filters, the image appears to shift ever so slightly. This is an intentional shift called dithering, where after each exposure, the telescope mount moves slightly in a random direction to help eliminate issues such as hot pixels.
Before we stack more images into each filter, we should look at two types of image defects. We primarily care about two types of defects: amp glow and dust spots/vignetting. These can be easily calculated and removed from the images by taking calibration images: dark and flat frames.
Amp Glow
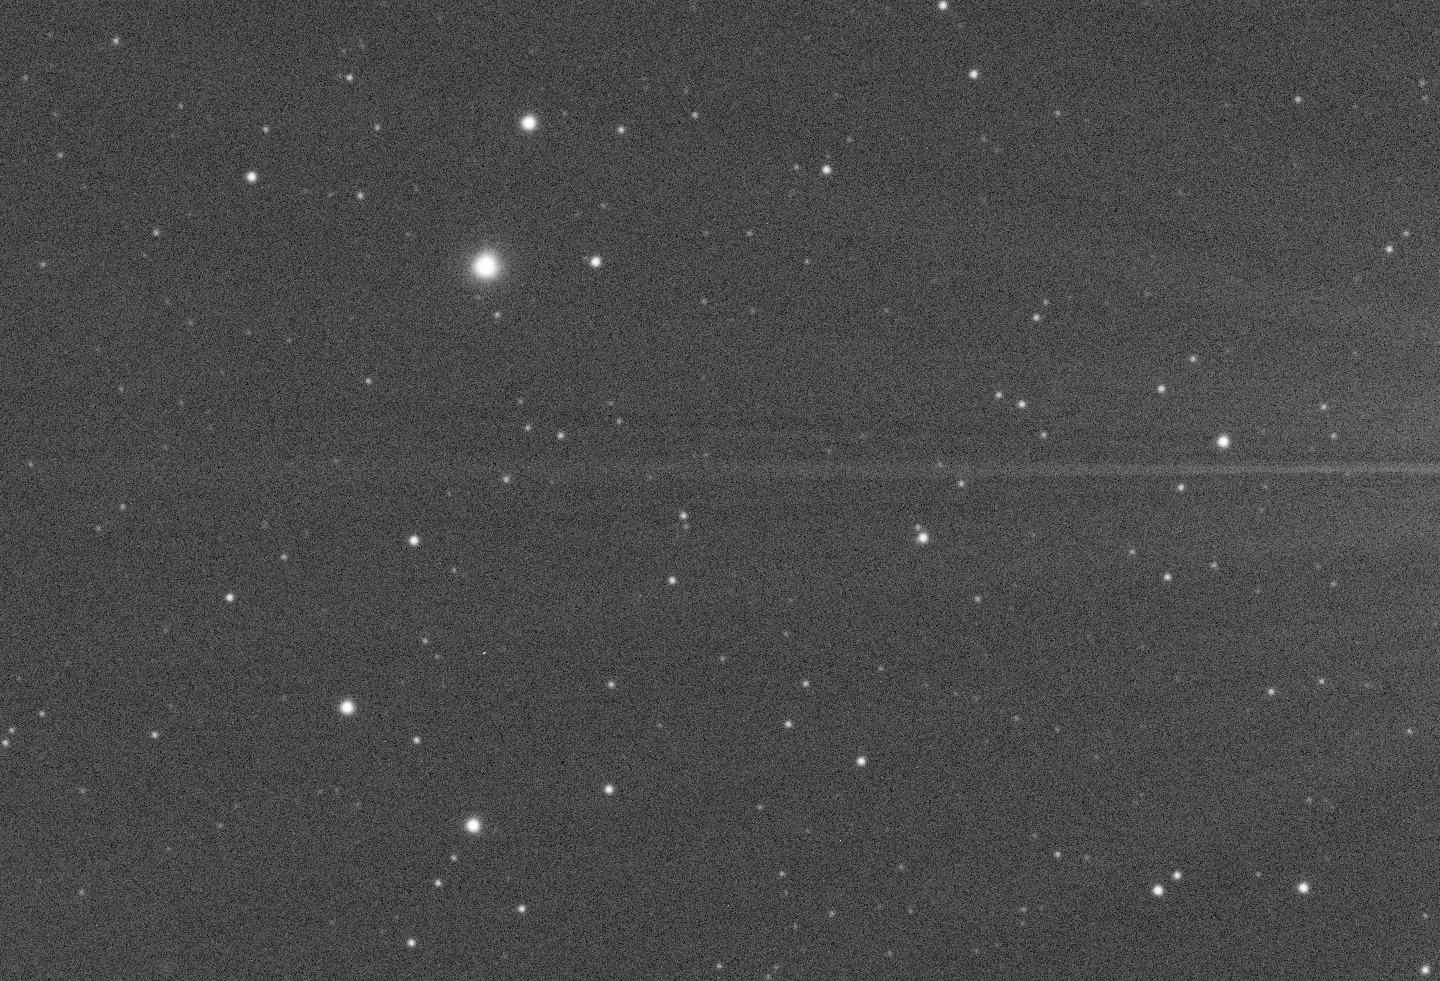
Let's look at amp glow first. On the right-hand edge of each image above is a slight "starburst" pattern radiating out from the edge. This is called amp glow, and the camera's circuitry causes it during long exposures (5 minutes) such as these. Thankfully, these are simple to remove through dark frame calibration images.
The idea of a dark frame is to calculate how much of the signal (or thermal noise) of a given image at a specific exposure time is caused by amp glow. So, all we need to do for this is to block all light coming into the telescope and camera and take several 5-minute long exposures.
Amp Glow in Sub-Exposure
Due to the circuitry within the camera, thermal noise builds up during long exposures and adds in noise in the shape of a starburst. This is something that is easily fixed.
Some newer astrophotography cameras have now been designed to have no amp glow whatsoever, but all we need to address this are some dark frames.
Dark Frame
This is an example dark frame taken with a 5-minute exposure - the same length as the sub-exposures. Dark frames are easily re-used; this image was taken a year before these images of the Soul Nebula.
All you need to do for these images is ensure no light can hit the camera sensor, so I just capped my telescope when taking it.
Dust and Vignetting
Let's look at dust spots and vignetting. These are the same problems: Something in our optical path reduces or alters the light that gets to our camera sensor, creating uneven illumination. Most often, this is caused by dust or pollen on the telescope, filter, or camera sensor. It is a rule of thumb not to clean optical systems unless necessary, as cleaning can lead to permanent damage.
To fix these, we need to take flat frames. These are calibration images where we illuminate the camera sensor uniformly without over-saturating it. Typically, a value of about 50% of the maximum illumination is used. Since we are also attempting to remove dust from the system, these images are best taken the morning after each night of imaging for each filter to limit any changes in the dust on the system. I place an Elgato Key Light on my telescope each morning to do this.
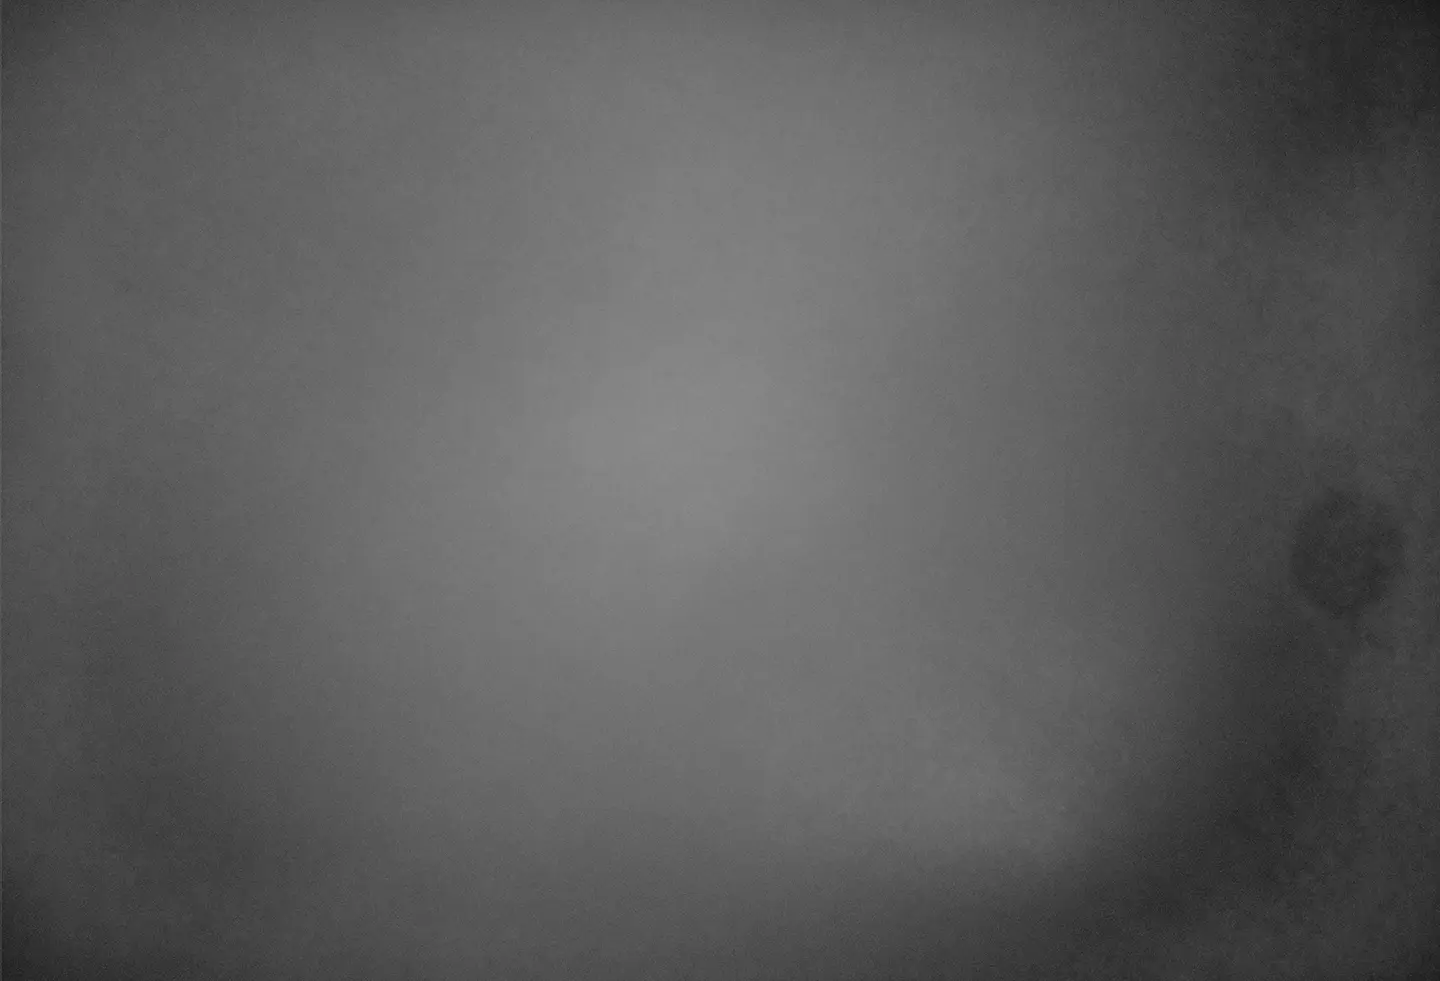
I've exaggerated the flat frame below to make it easier to see some of the defects we are calibrating for. The edges are dimmer than the center, showing the vignette pattern, and on the right-hand side, there is a circular dark spot - a mote of dust. My optics are relatively clean in comparison to most. Typically, there could be tens to hundreds of those spots, and we'd still be able to calibrate the image fine. A rule of thumb is that camera sensors and telescope lenses should only be cleaned if absolutely necessary.
Another thing we also have to do is calibrate out the minimal amp glow in the flat frames - I won't attach an image as it just looks black.
H-alpha Flat Frame
Flat frames typically show the vignette pattern around the edges of the image, as we can see here with the H-alpha flat frame. There is also a circular dark spot on the bottom-right of the image. This is likely a mote of dust on the camera or telescope lens.
Each morning after a night of shooting, I'd take 50 flat frames for each filter one after another - typically, these only need to be exposed for one second, so they go quick.
SII Flat Frame
We can still see that circular dark spot in the SII flat frame in the exact location, so we know it isn't on the filter. The image looks slightly different compared to the H-alpha frame; this is exaggerated for this site, but there are some minor differences as they let in a different band of visible light.
OIII Flat Frame
For the OIII flat frame, we can still see that circular dark spot, so we know that it definitely isn't on the filter.
The final image would look significantly worse without flat frames, so they are a vital process step.
Integration
At this point, we have all the data and images we need to make our image of the Soul Nebula. So, the next step is to combine everything we have captured to produce a stacked image for each filter.
A quick overview of all of the data:
H-alpha
134 light frames (over 6 nights)
300 flat frames (50 each morning)
300 dark flats (50 each morning)
SII
94 light frames (over 6 nights)
300 flat frames (50 each morning)
300 dark flats (50 each morning)
OIII
104 light frames (over 6 nights)
300 flat frames (50 each morning)
300 dark flats (50 each morning)
All
1 master dark
You can see that we don't have the same amount of light frames for each filter. This is due to some captures being thrown away from being out of focus or blocked by a cloud. An imbalance with this exposure time per filter will have a negligible impact on our overall result. Thankfully, integrating all of this together is handled automatically by PixInsight, an astrophotography-focused program, and takes ~5 hours for this amount of data.
Stacked
What we get from stacking the images together is one master image for each filter. Each contains more signal and less noise compared to the individual sub-exposures. It's important to note that what we are picking up with these filters are ionized hydrogen, sulfur, and oxygen atoms from nearby ultraviolet radiation.
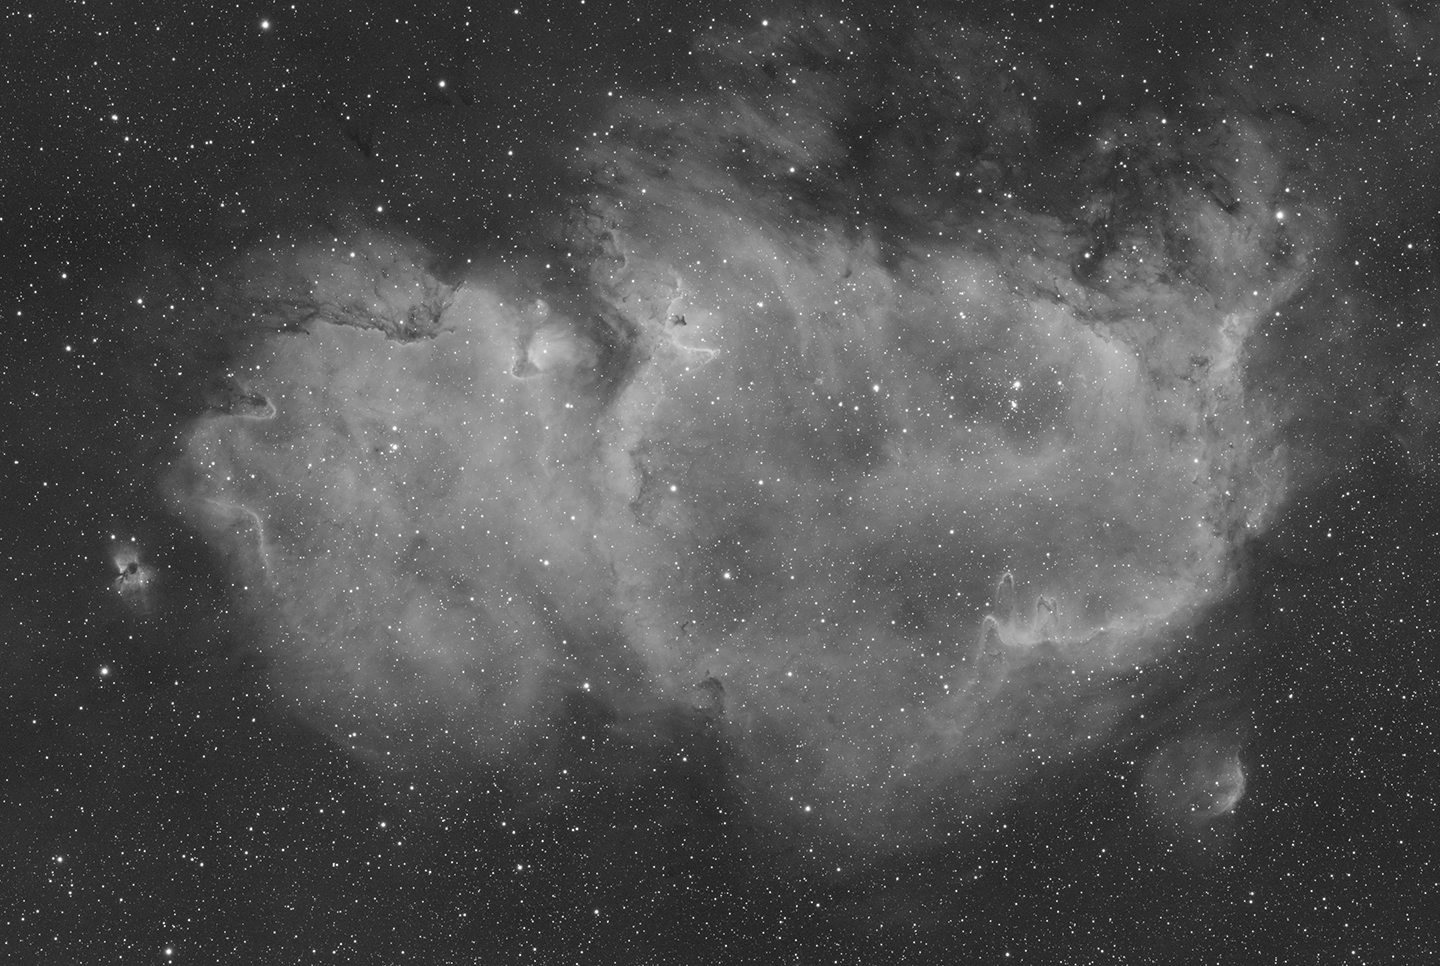
H-alpha Stacked
The stacked H-alpha image contains the most detail out of the filters. This filter got the most integration time, and emission nebulas like the Soul Nebula have many ionized hydrogen atoms. All the white cloud-like structures within the image are massive swaths of hydrogen gas that the ultraviolet radiation from the stars within has ionized.
Stellar wind, flowing streams of gas and particles ejected from stars, creates the cloud-like formations seen here.
SII Stacked
The stacked SII image outlines the edge of the Soul Nebula, where singly ionized sulfur atoms lie. We see the clouds here where the ionization front is for the nebula, as doubly ionized sulfur gains an electron from neutral Hydrogen atoms - producing a singly ionized sulfur atom.
From this, we can see that the SII image tends to be just around the nebula's edges, where the radiation starts to tail off and stops producing ionized hydrogen.
OIII Stacked
The stacked OIII image contains details of the interior of the Soul Nebula, as that is where most of the doubly ionized oxygen is. It takes more energy to ionize oxygen atoms twice. We typically see strong OIII signals from young and hot planetary nebula and weaker signals in emission nebula such as this one. The farther one goes away from the radiation source (the stars in this case), the fewer doubly ionized oxygen atoms we see.
A planetary nebula is not related to planets and is caused by smaller stars, like our Sun, gently shedding away their outer layers instead of going supernova.
Sub-exposure Versus Stacked
It has been a while since we looked at the individual sub-exposures, so let's compare them to the stacked versions. One thing you may notice when going between the sub-exposure and the stacked image is that the stacked image shifts slightly. This is due to needing to line up all of the other images onto one another, so we need to crop the stacked image slightly.
H-alpha Sub-Exposure
Going back to our H-alpha exposure, there is actually a decent amount of hydrogen gas that we can see in the image. You can also see the amp glow caused by the camera on the right-hand side.
H-alpha Stacked
The stacked H-alpha image, however, contains significantly more detail, and the amp glow has been calibrated out.
Sulphur II Sub-Exposure
Returning to our SII exposure, it is hard to see much detail as it is faint. This is common for the SII filter as there are fewer singly ionized sulfur atoms than ionized hydrogen atoms.
SII Stacked
The stacked SII image, however, does a much better job capturing the sulfur gas, and we can see that it is predominately around the edges of the nebula.
Oxygen III Sub-Exposure
The last one is the OIII exposure; similar to the SII exposure, it is hard to see the doubly ionized oxygen gas.
OIII Stacked
When stacked, though, we can see that the doubly ionized oxygen gas is contained mainly within the entire interior of the nebula and almost none on the edges.
Combining into RGB
Now that we have our three master images for each filter, we can combine them into a single color image. But before we do that, there is some data cleaning that we need to do here. Specifically, removing light gradients caused by light pollution, reducing blur caused by the atmosphere and optical defects, and finally, reducing noise. I have opted not to show these steps as the visual changes are hard to see without zooming in and analyzing pixels. I will leave that for a later article to focus on those improvements.
Creating a color image from these three images is straightforward; we can map each image to a single color channel in RGB. For example, we could map the SII filter to the red channel, the H-alpha filter to the green channel, and the OIII filter to the blue channel. The output would produce a false-color image of the Soul Nebula - basically, since we do not actually have RGB data, we can't create an accurate color image. This practice is common for deep-sky astrophotography and allows for an easier time to discern details that would not be visible otherwise.
A quick note: palettes for astrophotography are typically referred to as three-letter acronyms. For example, the SHO palette means that SII was mapped to red, H-alpha to green, and OIII to blue.
Let's take a look at some standard color combinations.
Standard Hubble Palette
Made famous from images produced by the Hubble Space Telescope, the Hubble Palette maps SII to red, H-alpha to green, and OIII to blue. This creates a primarily green-colored image due to how much stronger the H-alpha signal is compared to SII or OIII. This is just the start of the Hubble Palette; through some color adjustments, the final image will be green, orange, and blue. Not only does this produce a striking image, but it also conveys more detail than we can see with the naked eye.
This is also known as the SHO palette, and while still popular today, other palettes have been gaining popularity.
Modified Hubble Palette
The previous palette was just the start of the Hubble Palette - commonly, the green channel is reduced to produce a more orange/blue palette. That is what this image is.
The HSO Palette
Next, we have the HSO palette, mapping H-alpha to red, SII to green, and OIII to blue. This palette produces a different range of colors compared to the others. This one is more challenging to work with than the others, and it largely depends on the actual composition of gases in the target captured. However, this produces a unique color scheme for the Soul Nebula.
The HOO Palette
The SII filter typically has a weak signal compared to the H-alpha and OIII filters, so it is common for some targets to not image with the SII filter. This produces the HOO palette, where we map H-alpha to red and OIII to green and blue. This is a closer representation of what a true-color image would look like for many targets, but the range of colors is mainly red/cyan.
We can see from this image, though, that the H-alpha signal overpowers the OIII signal, and we are left with a mainly red image. Planetary nebula (which the Soul Nebula is not) commonly work well in HOO palettes due to their strong OIII signals.
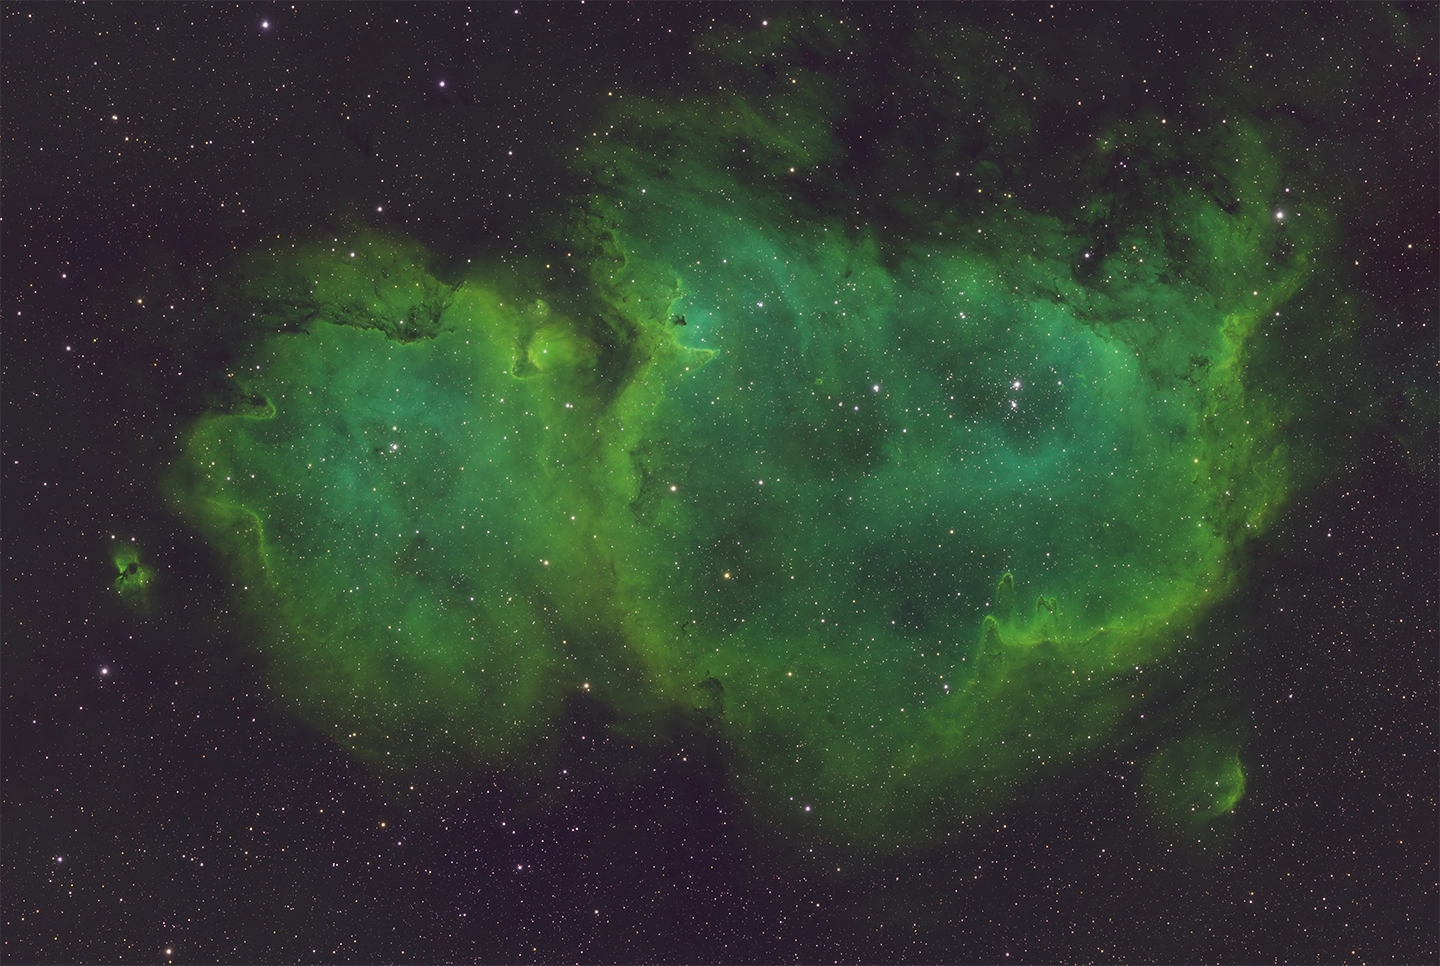
Dynamic Hubble Palette
Our final palette is what I call a dynamic Hubble Palette. This maps SII to red, H-alpha to green, and OIII to blue. However, for both the red and green channels, we add a little bit of each filter to them. This produces a more balanced color range of red, cyan, and green. How much each filter contributes to each color channel is typically left to trial and error, as different targets will benefit from different blends.
This is the palette we will go with to create our final image.
Stars and Starless
I opted to go with the dynamic Hubble Palette image as it produced a better range of colors than the standard Hubble Palette. Soon, the next step will be focusing on increasing the saturation and contrast and bringing more color into the nebula, but before we do that, we need to address the stars.
The Issue with Stars
Now that we have combined the three channels, we have our color image. The color here is relatively muted, so the plan is to isolate the individual RGB channels and alter their hue/saturation. This will allow a more dynamic range of colors to be represented in the image to highlight finer details better. One issue, though, is that the stars in the image are considerably brighter than the nebula structures, so if we don't exclude them from our changes, we'll over-saturate them.
The solution here is simple - we remove the stars.
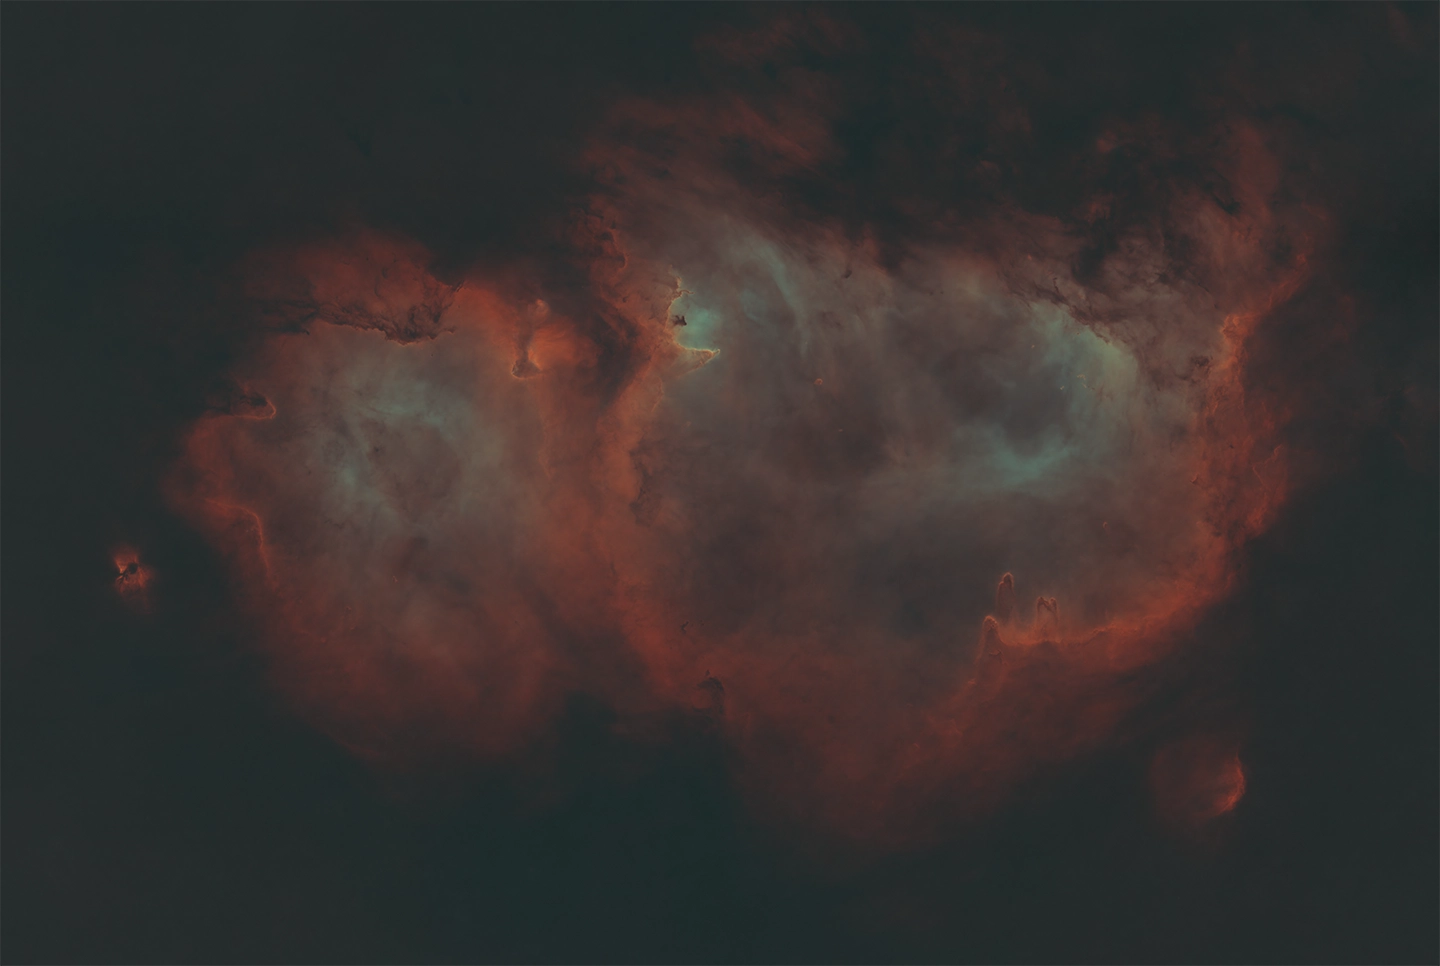
Starless
Machine learning makes this process quick, precise, and accurate. We are left with a starless image of the nebula where we can focus on adjusting the color without fear of ruining the stars.
The stars will be added back in toward the end of processing.
Just the Stars
Removing stars from images has been a common practice in astrophotography processing. Occasionally, some will take an entirely different set of images of a target while using red, blue, and green filters (compared to Ha, SII, and OIII filters) to use as the stars. The image then would be a combination of narrowband data to capture ionized gases and broadband data to capture a more "true" color representation of the stars.
I opted not to use RGB stars for this target to make processing this image more straightforward, but they would have improved the overall color range of the stars.
Coloring
At this point, we will focus entirely on the starless image and begin adjusting its color balance. This works because we have different sets of color masks that we can create and then place on the image. For example, we can create a red mask that will ignore everything in the image besides the strongest red signals. This allows us to isolate areas of the nebula to work on while not impacting others - especially the background.
This is an iterative and slow process. Each step is to create a single color mask, apply it to the image, and then carefully adjust the color profile. It's not uncommon to repeat this process several times, which can take many hours.
Each image in the grid below is a single step of this coloring process.
Starless (Original)
Our coloring changes will now build off this starting starless image.
Initial Red Mask
The first color mask applied is red, precisely one to focus on the interior edges of the nebula. This maps quite well to our SII signal, and I'd like to improve the contrast here.
Next, we focus on the interior.
Increasing the Blue
Within the Soul Nebula is an oxygen-rich gas cloud; I'd like this to have a more striking blue and cyan color, so a blue mask is used to focus on the interior structure of the nebula. We will increase the saturation and blue channel here.
More Blue
While we increased the blue with the last step, it isn't enough, so we will do the same process again. Doing this in two steps helps to ensure that we don't overdo it and can more easily revert our changes.
At this point, I'm happy with the darker blue color of the interior, but I want more cyan in it, so we'll do that next.
Adding Cyan and Green
Using a green mask allows us to focus on the interior of the nebula and the central wall. Increasing the amount of green here has brought out significantly more contrast throughout the image.
Next, we will go back to the edges of the nebula.
Improving the Edges
We are finishing up with the coloring process. All that is left is to improve the contrast of the outer edges of the nebula. We will use a red mask and make a stronger orange color to do this.
One step isn't enough, so we will do it again.
The Final Red Mask
This is the final color tweak applied, making the edges more orange. At this point, the image is reasonably well-colored.
Our next step is to improve the contrast overall.
Contrast Adjustment (Final)
All we did here was make the dark regions of the image darker and the bright regions brighter, but it had a significant impact.
Now add the stars back in.
Adding the Stars
Adding the stars is a simple process; we place the star image on top of the starless image.
At this point, we are essentially done.
Wrapping Up
With all of the editing done, here is the higher-resolution image. Note that it will open in a new tab and may take a bit to load.